Servo Motor with Microbit
Let see what we can do to add some motion to the Micro:bit projects.
We are going to use a servo motor. A typical servo motor is given an angle between 0 and 180 degrees. It can move back and forth to control things or make things move a little bit. These motors are often used in radio-controlled airplanes or cars to control steering.
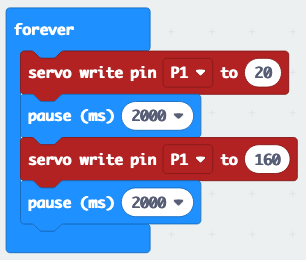
One of the nice things about a servo motor is that it is easy to control. The following block of code tells the servo on Pin 1 to go to 20 degrees, wait for 2 seconds, go to 160 degrees, wait for 2 seconds, and then just repeat.
Wiring it Up
How about wiring up the motor? The video included here shows the process that is described in the rest of the web page.
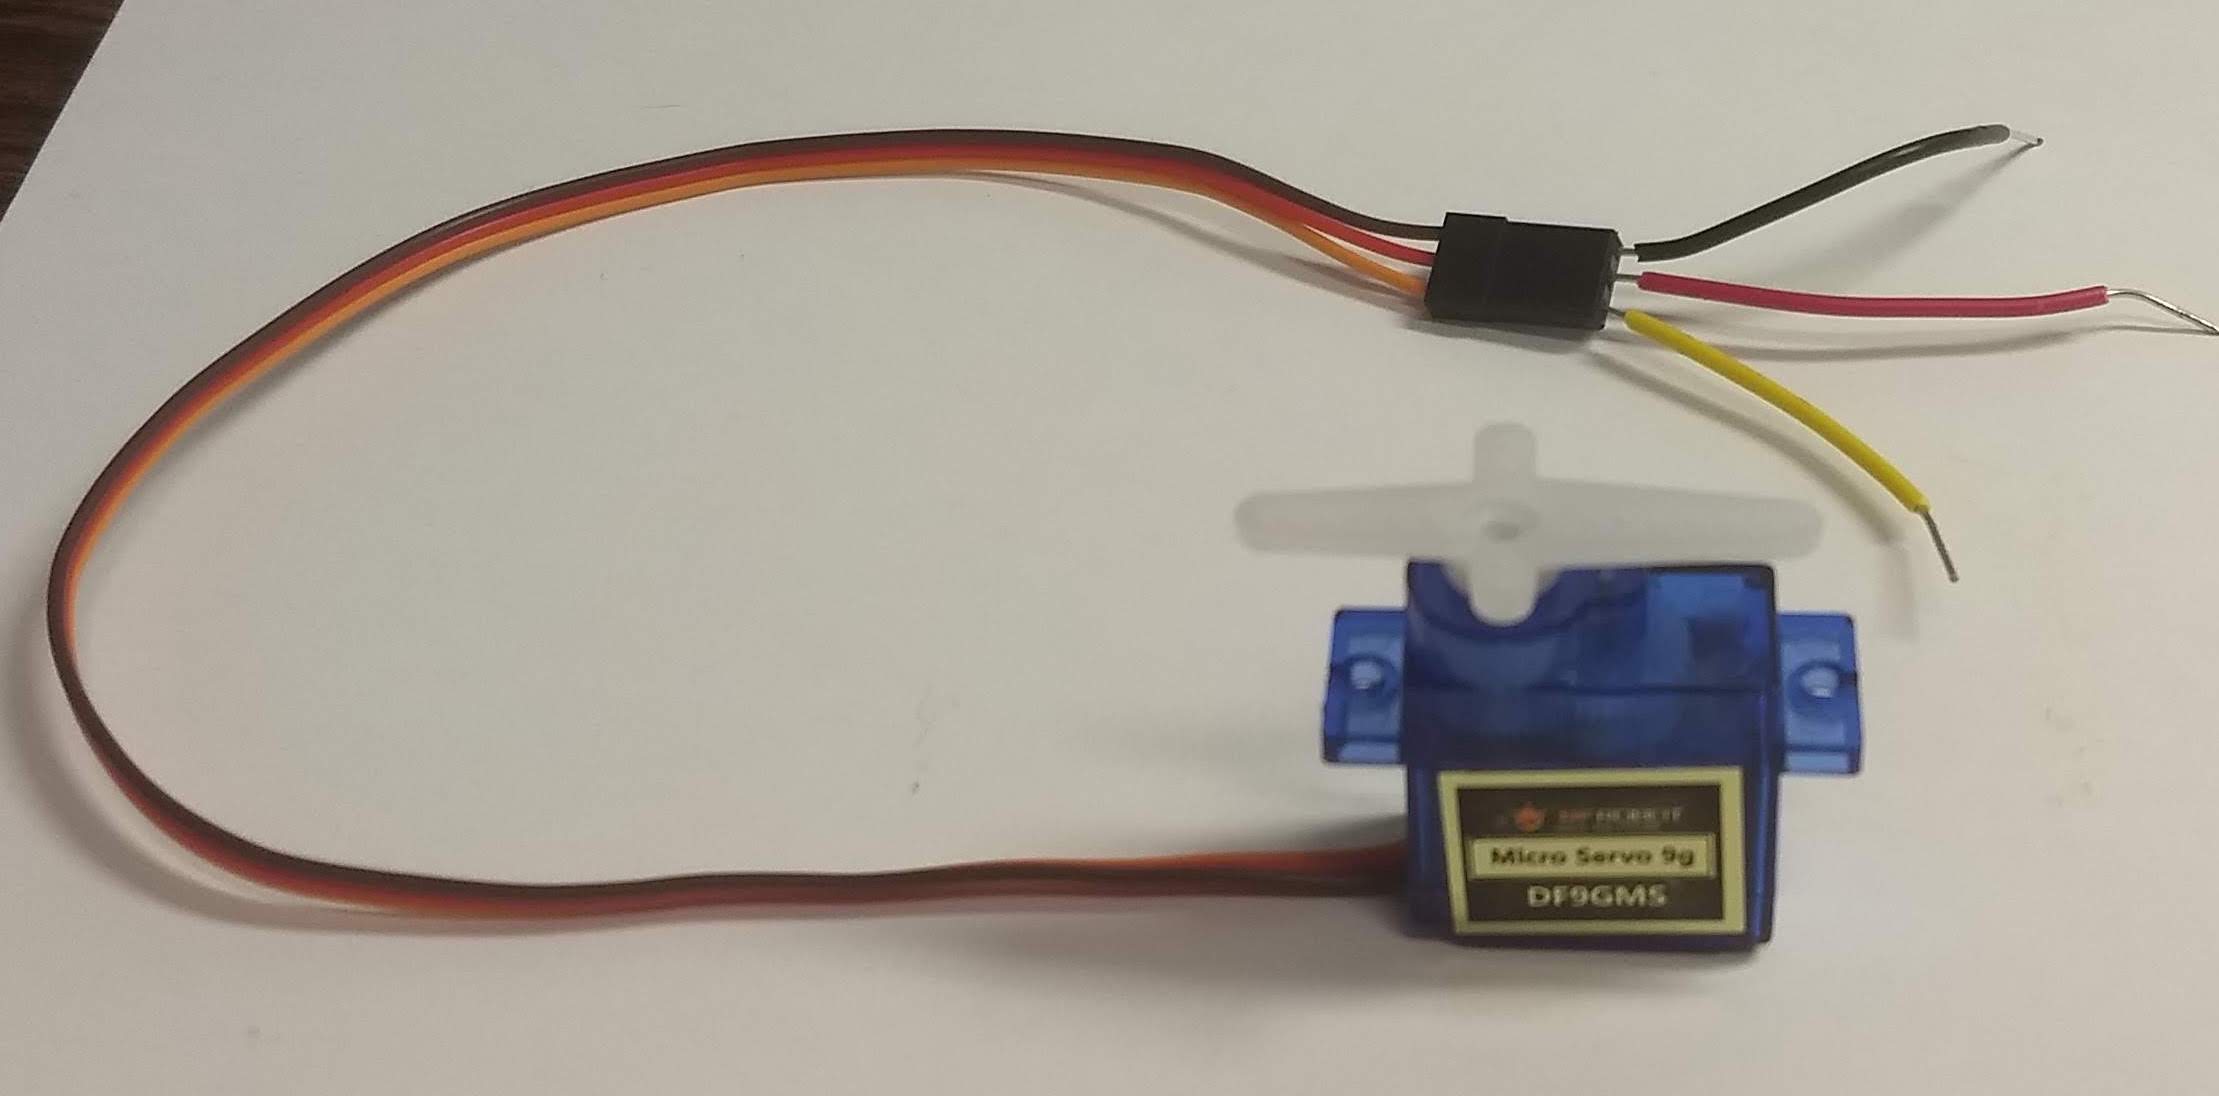
Pull the motor out of the bag. You can place one of the servo horns (attachments) onto the little knurled knob on the top of the motor. We can attach things to the horn so that they move when the motor moves.
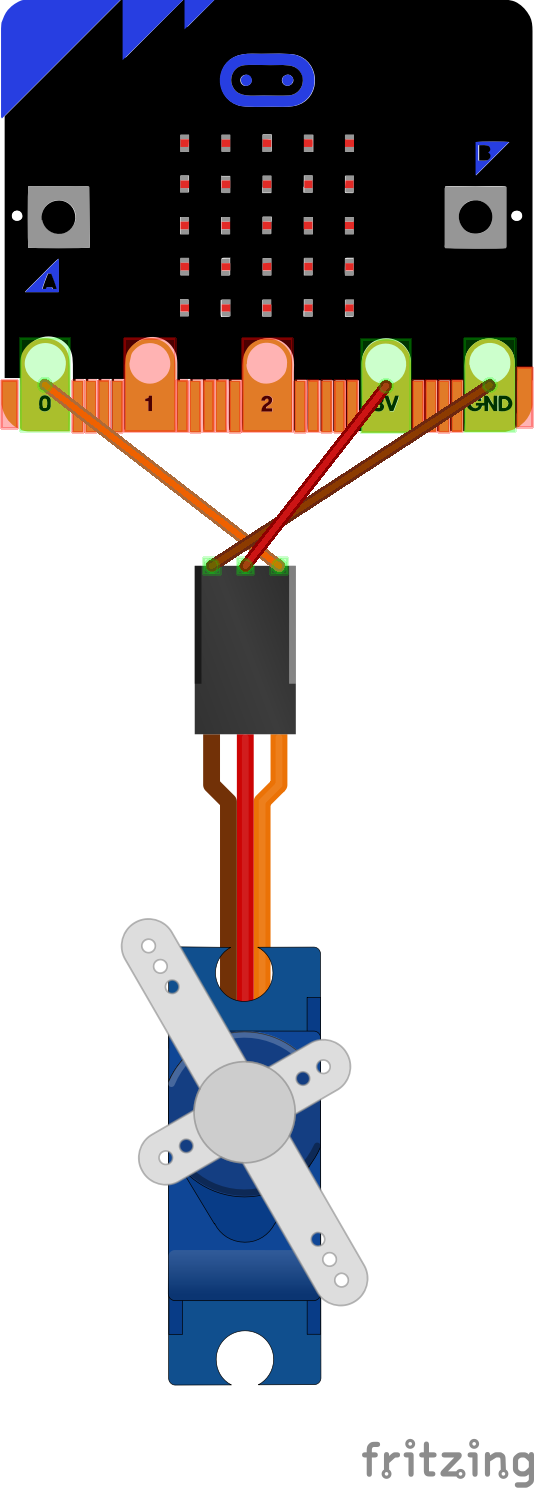
The servo motor has three wires:
- The orange wire is the signal wire. We will attach this to Pin 1 (since Pin 0 is probably being used by the backup and speaker).
- The brown wire is Ground. This needs to be attached to the Micro:bit Ground (GND).
- The red wire is the electrical power. For now we will attach this to the 3V connection on the Micro:bit.
The following diagram taken from the Micro:bit website (Article: Using a servo with the micro:bit) shows a sample (though they hook up to Pin 0).
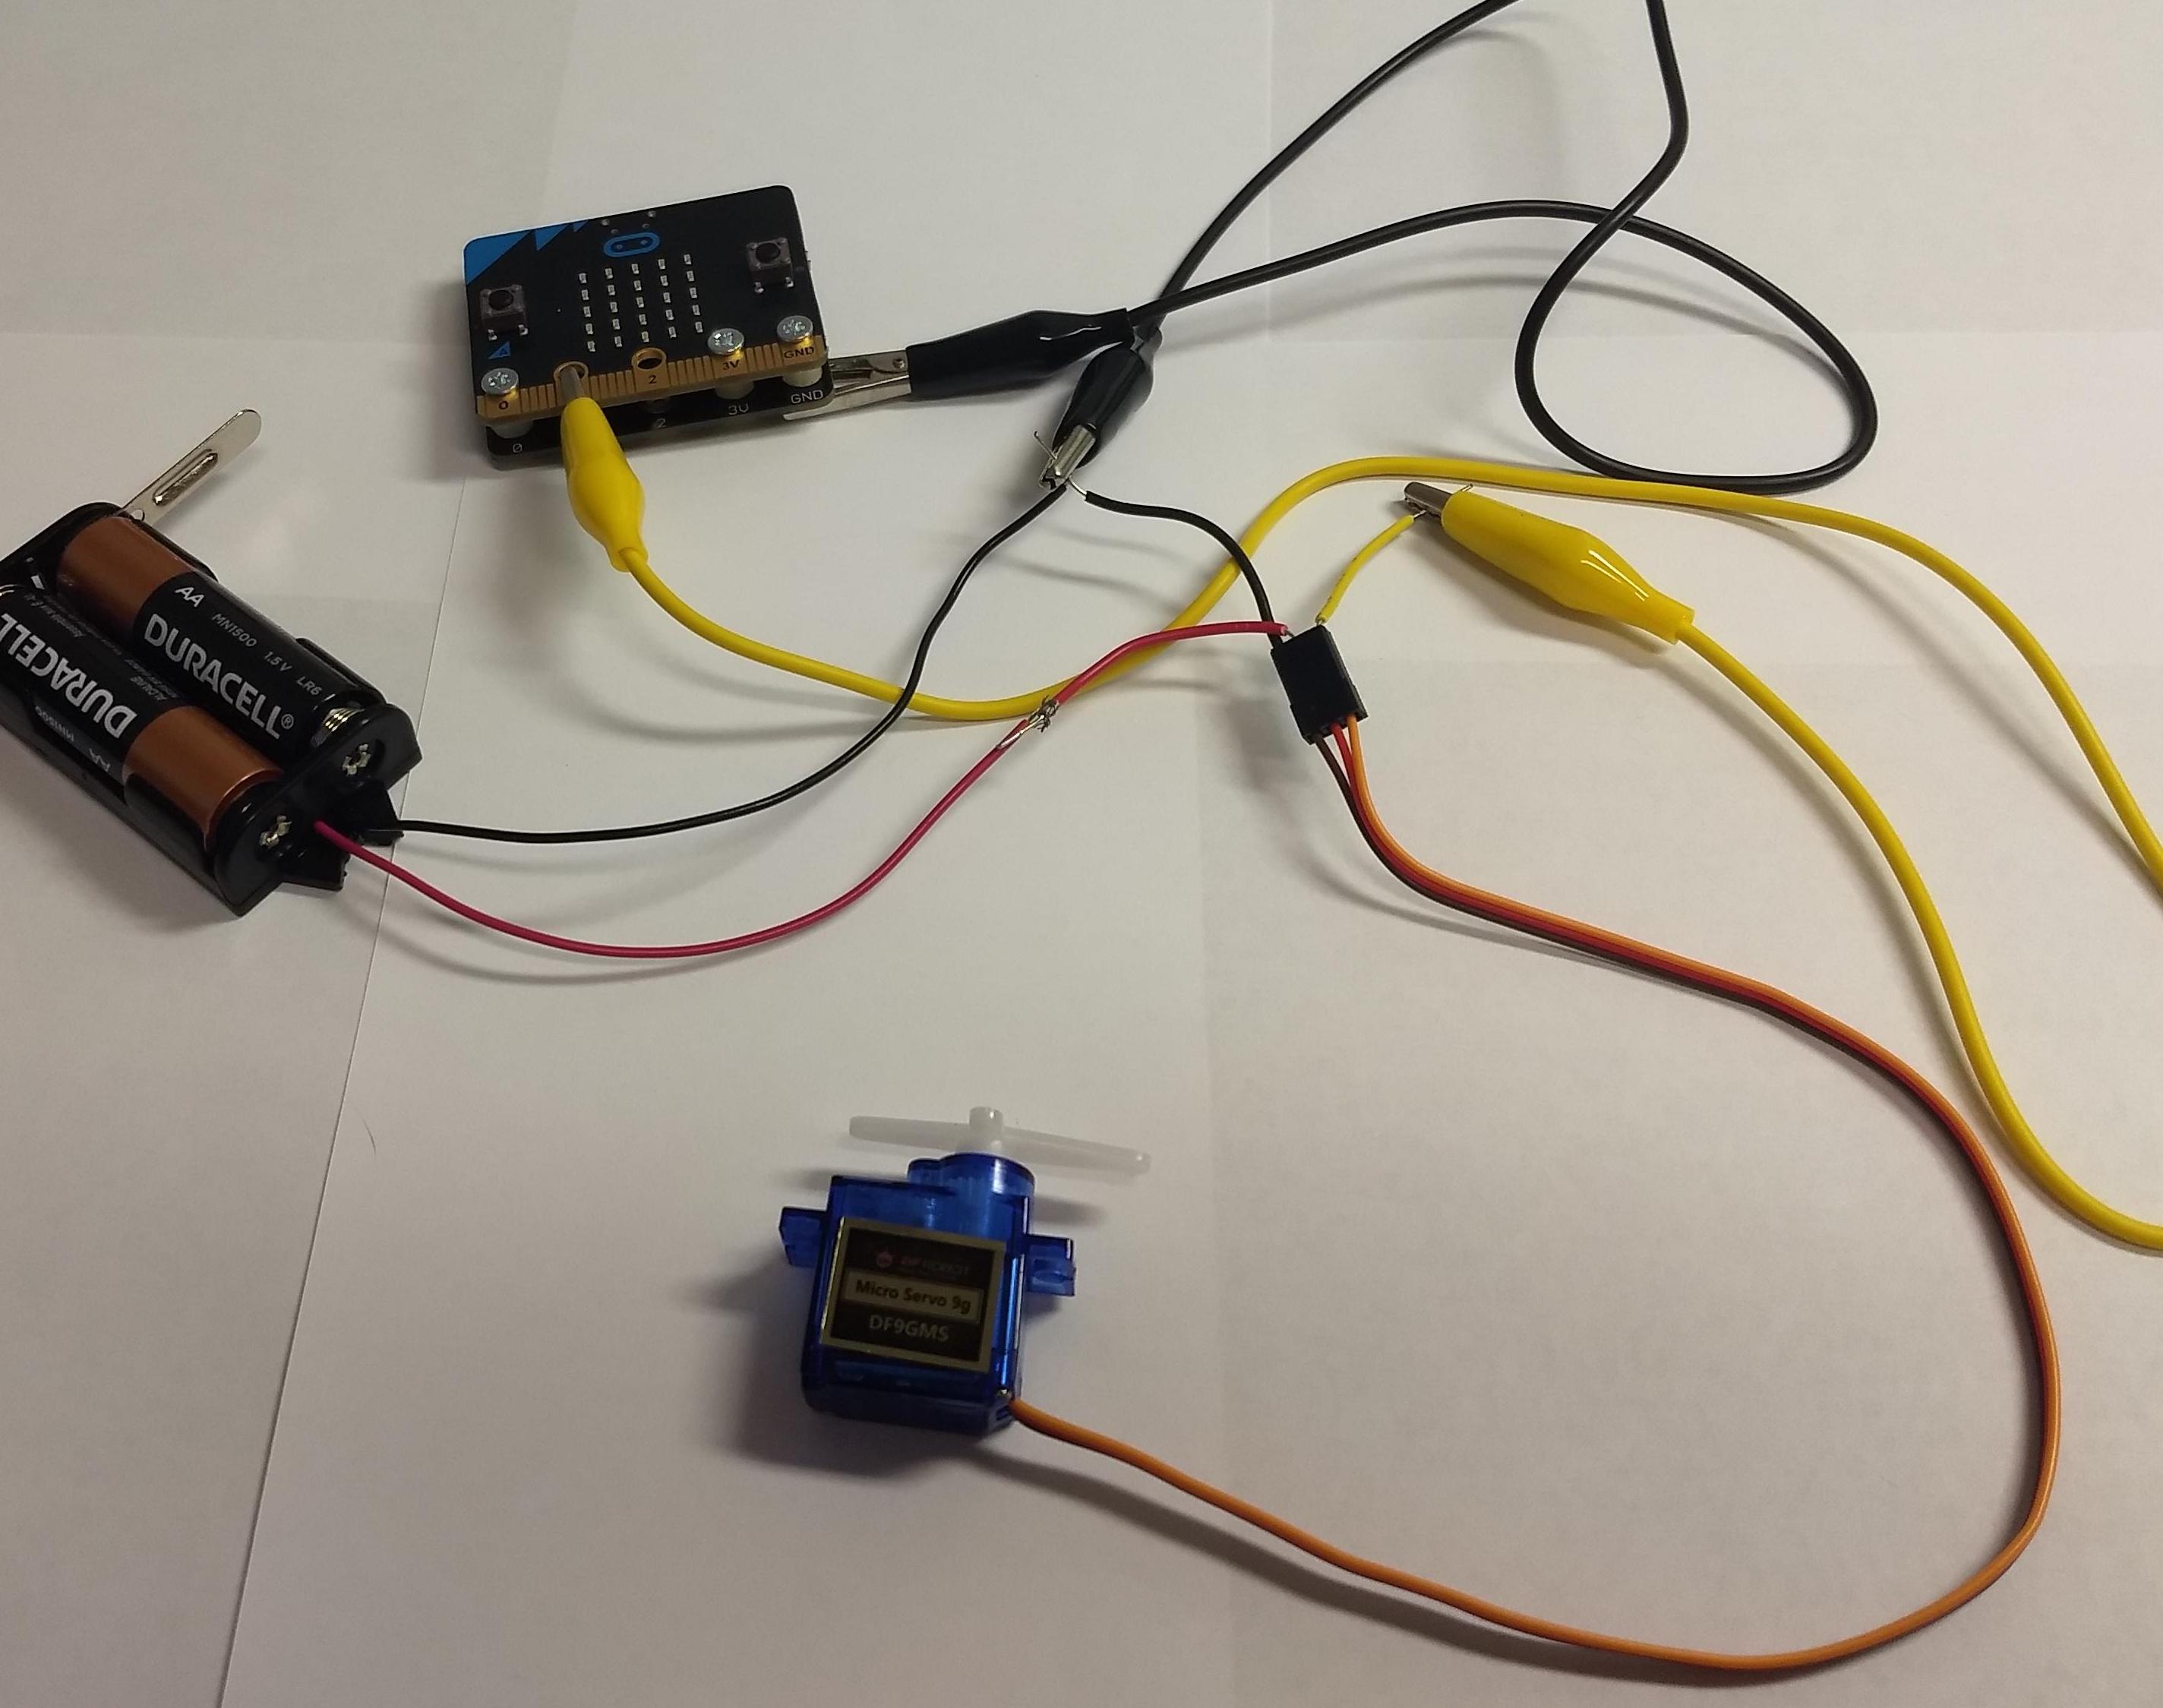
There are several wires in the kit that you can gently insert into the servo socket so that you can attach the alligator clip wires to the servo wires. You may want to wrap a little tape around the servo connector to hold the three wires in place.
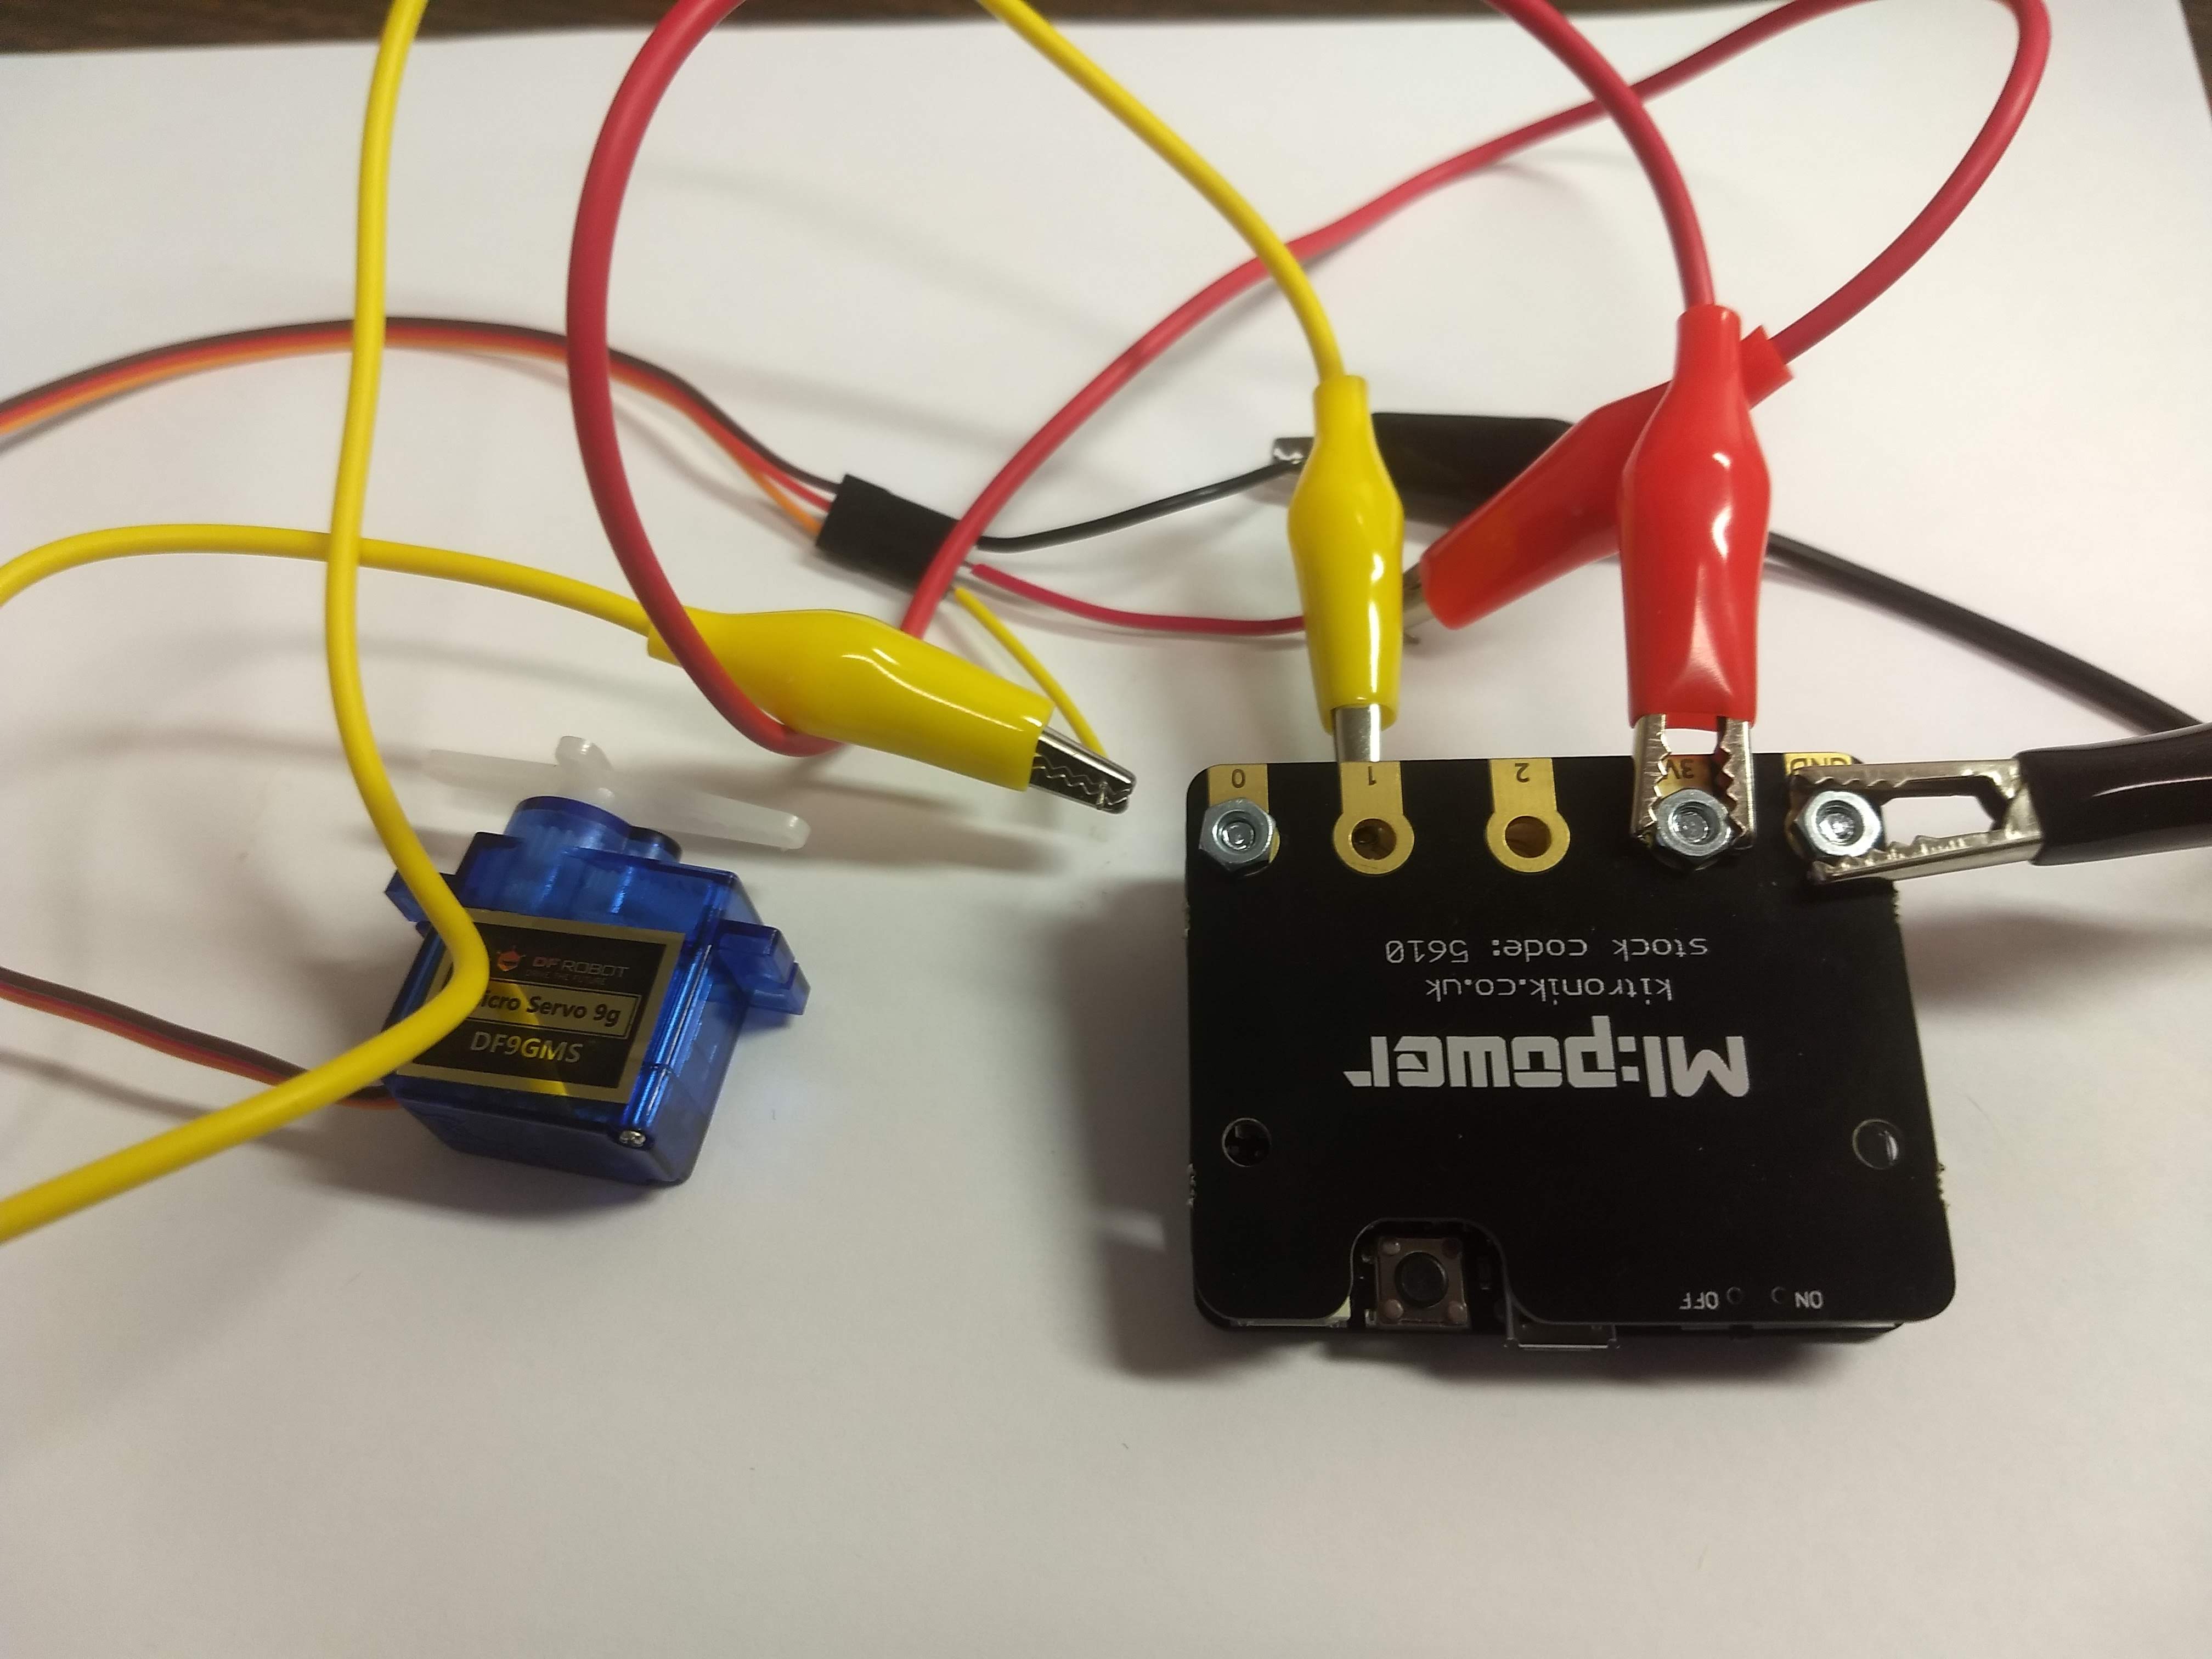
When attaching the alligator clips to the Microbit, you want to be careful that adjacent clips do not touch. With all three connections, make sure you are not touching other pads. If you are using the MI:power, I would suggest hooking up the 3V and the Ground to the back as shown (Pin 1 must be connected directly to the Micro:bit.
In a perfect world, this would work okay, but here's the problem. These motors really want to have 5 Volts, not 3 Volts, in order to function well. They are right on the threshold of working at 3V.
While some projects and web pages show using powering the servo from the Micro:bit directly, we have not had success with the servos we purchased. Instead we will use the external battery pack from the electric racer project. This is still 3V (two AA batteries), but seems to work if the batteries are fresh. If you have a 3 or 4 AA battery case, you can use that to get better performance.
The image below from the Micro:bit website shows the general idea.
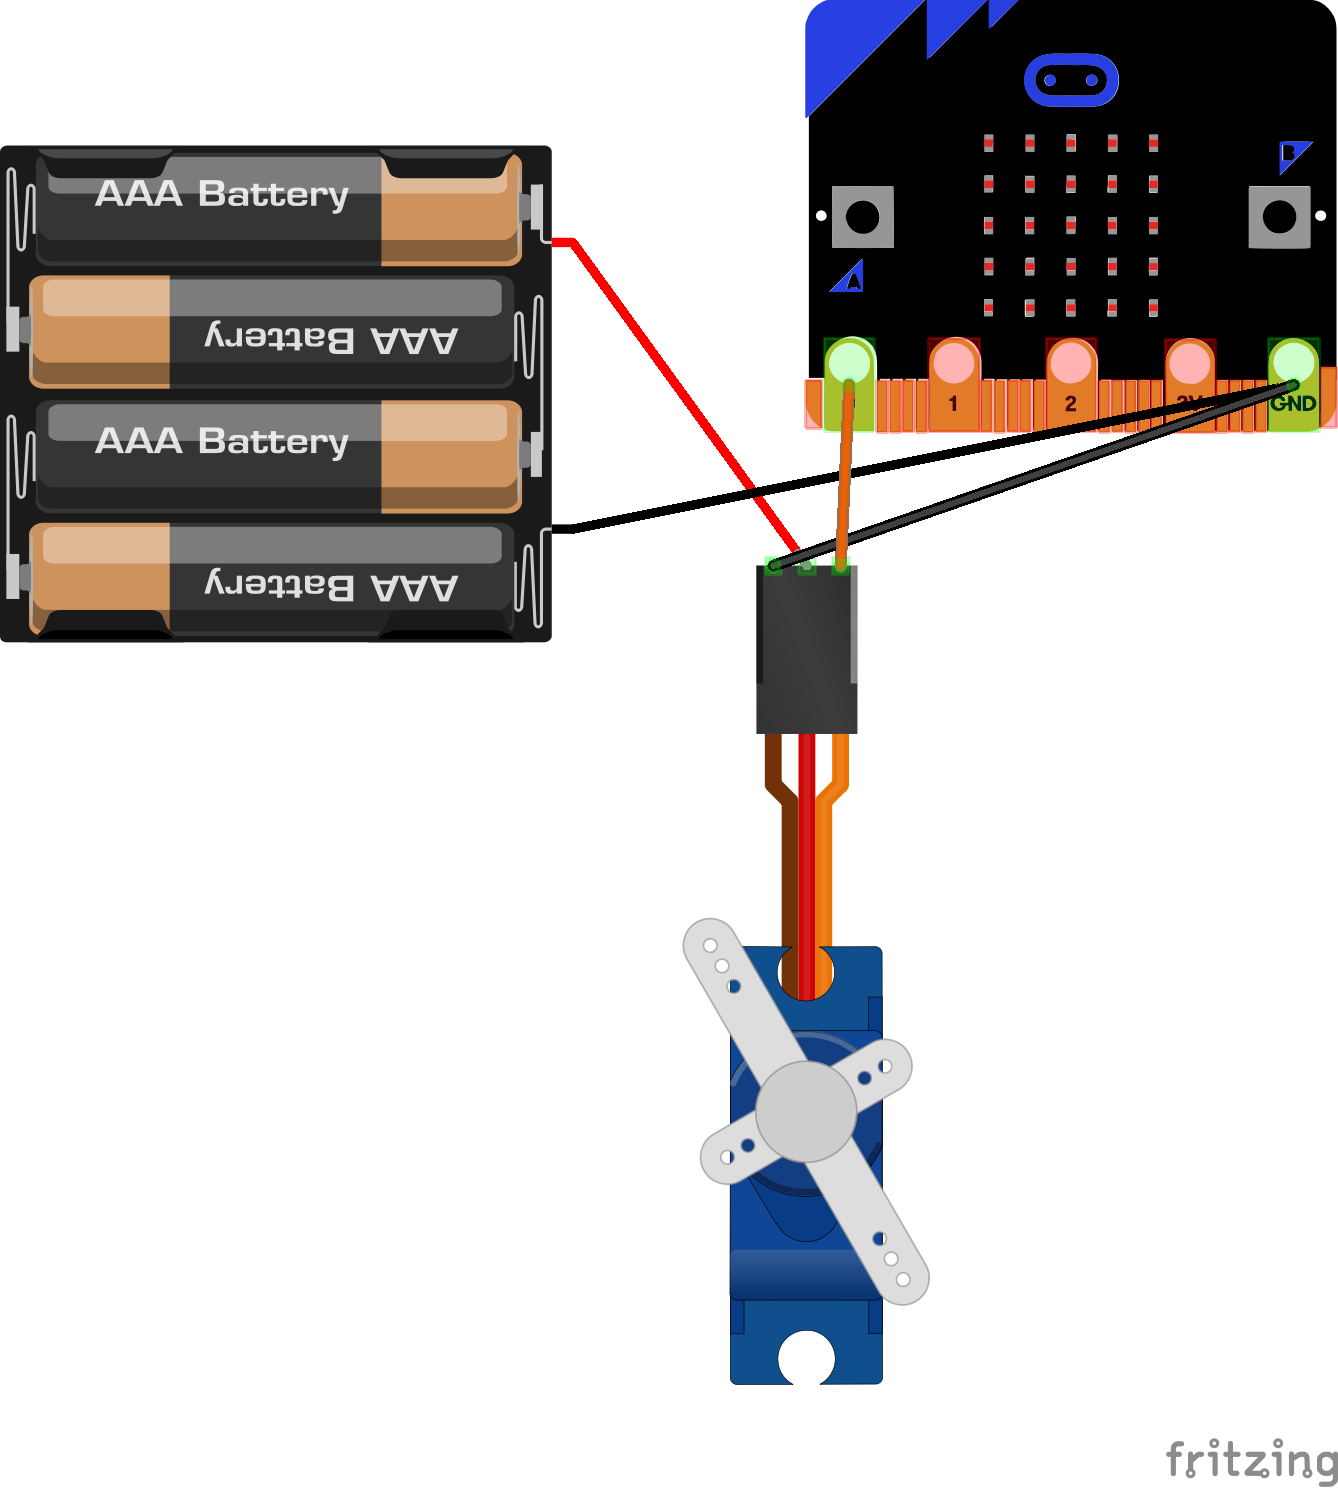
There are two steps to hooking up the battery pack:
- Take the 3V alligator-clip wire and connect it to the red wire of the battery pack instead of the 3V connection on the Micro:bit. (You can also just skip the alligator-clip wire altogether and wrap the battery pack wire directly on the red wire.)
- Take the black wire from the battery pack and connect it to the ground wire of the servo, but also make sure the ground on the Micro:bit is still connected. BOTH the servo and the battery pack will be connected to the ground on the Micro:bit.
It is a bit cluttered, but here is a sample setup. I opted to connect the battery pack to the red wire directly without the alligator clip wire.
Coding
At this point you can create sample code to run the servo. The command block for the servo can be found under Advanced, Pins as shown in the figure.
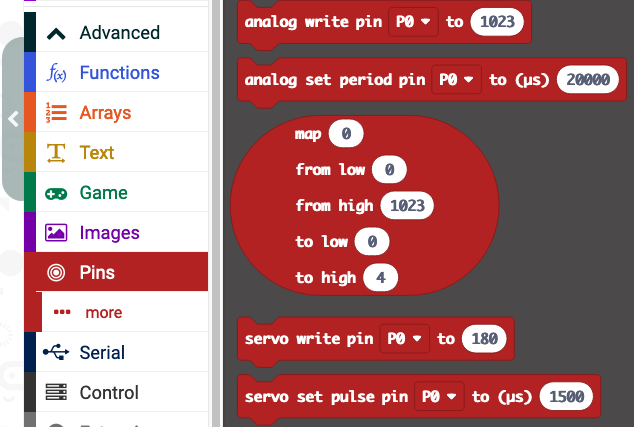
There is also a Servo Extension which you can install in Extensions. The servo commands will then show up as their own item in the menu.
Troubleshooting
If the servo is not working:
- Check all of the wires connections to make sure nothing is loose.
- Double check the wiring.
- Make sure your batteries are fresh.
- Double check that you are using Pin 1 with the wiring and with the programming.